A properly built workflow is the foundation for any project. It determines how effectively the team works and how good development goes. However, there is no single and equal approach to its building and maintenance because any project always has individual features and can constantly change. This is especially true for software development, which usually involves many different specialists working on unique tasks or a combination of them in a highly competitive environment.
Nevertheless, there are some common mistakes and universal rules to avoid them. There are also proven practices and examples of workflow that can make working on different types of projects much more efficient. And tools like Jira give you the flexibility to customize and change this workflow, making it as measurable and visual as possible.
This article will give you a lot of valuable and practical information about it all.
- What is the project workflow in Jira?
- What elements are used for building the workflow in Jira?
- Common mistakes in building Jira workflow
- Best practices to streamline Jira workflow
- How do you adapt Jira workflows for any department?
- Mad Devs approaches for building Jira workflow.
What is the project workflow in Jira?
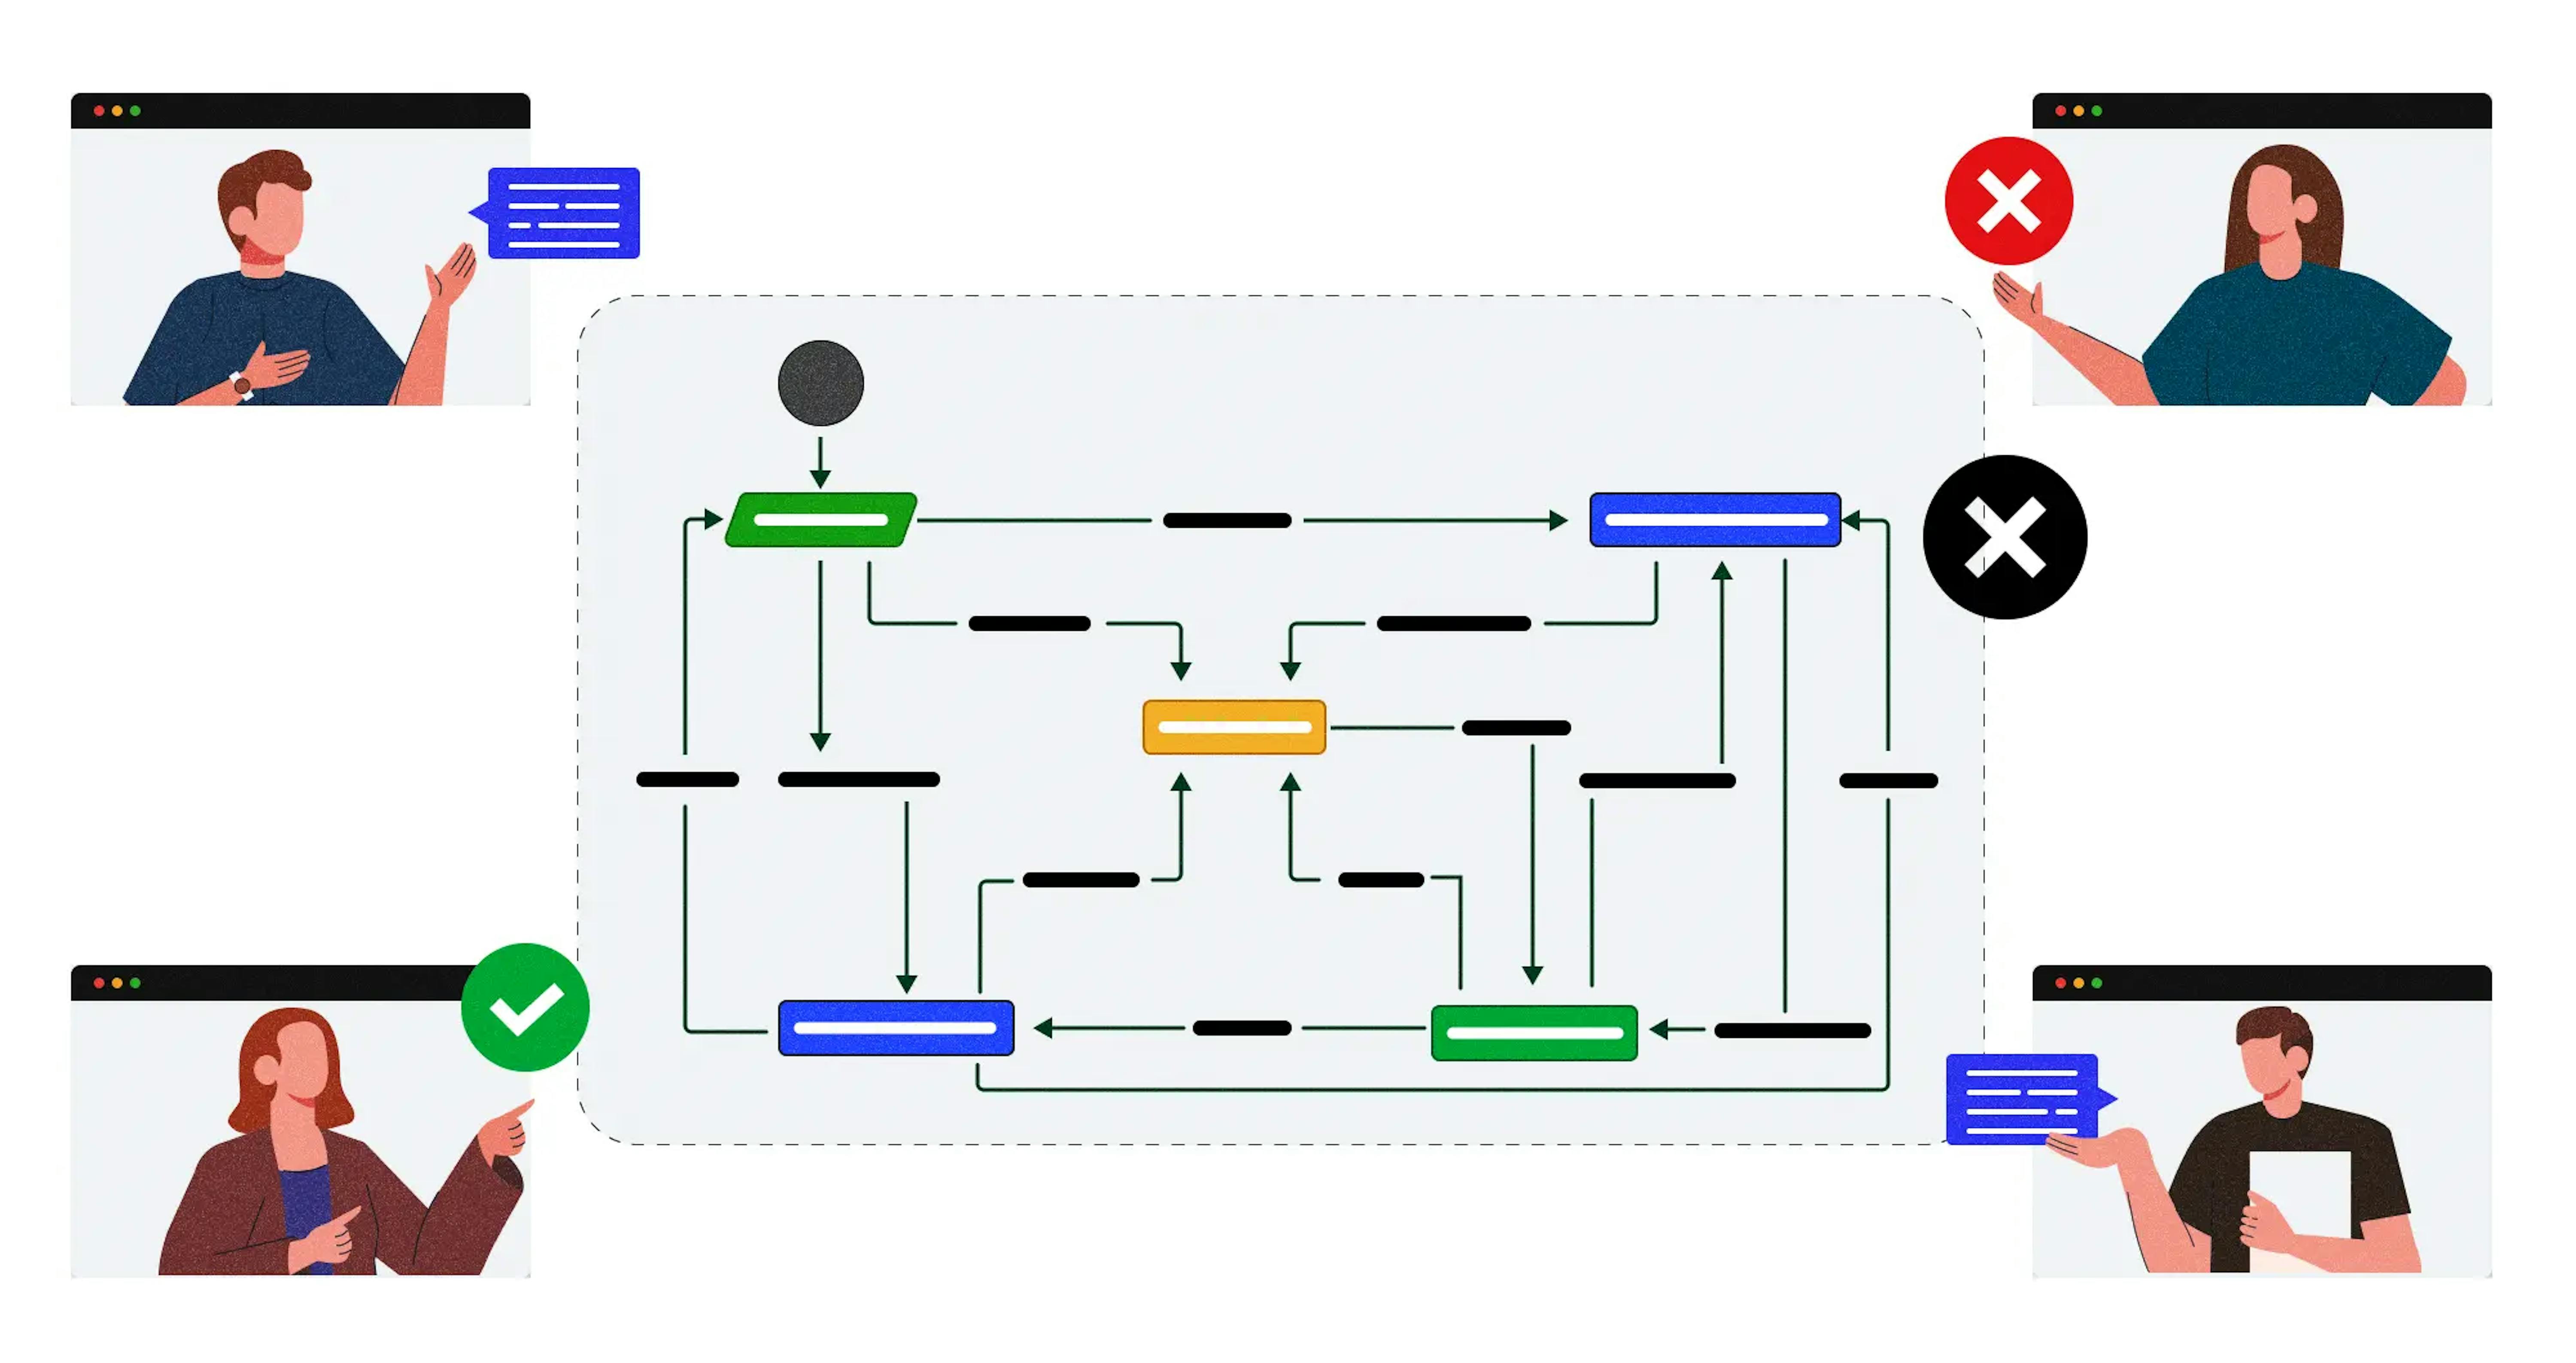
Let us define that a workflow is not just a sequence of actions united by a common goal. Workflow is a specific order of creation, distribution, and execution of tasks to ensure the achievement of this goal. It defines the statuses the task passes through, the transitions between these statuses, and indicates who has the right to perform certain actions during the work on the task. Therefore, it requires deep thinking at the start, careful tracking, and continuous improvement throughout the project to remain transparent and efficient.
We have many tools for this today, and one of the most popular today is Jira by Atlassian.
It is important that Atlassian also provides clear explanations to help you quickly launch and use their products. For example, they have a short tutorial on what a workflow is and how to build one in Jira, which we recommend you check in the source. And we'll move on to more detailed practical information.
What types of projects are in Jira?
It is worth noting that when you create a project, Jira immediately offers two types of projects, Jira Core and Jira Software, each with a basic set of the above elements and their capabilities. However, they serve different purposes and offer different possibilities.
Jira Core (for business)
This type is designed to manage business projects such as marketing, finance, etc., and provides the main task management and workflow features. Initially, it includes task statuses like To Do, In Progress, and Done that you can change or add new ones. However, Jira Core lacks some features specific to software development, such as integration with version control systems and Agile boards. So we will not focus on this and will go to the next one.
Jira Software (for software development)
This type is primarily for software development project management because it includes all the features of Jira Core and additionally provides Agile boards like Scrum and Kanban and integration with version control systems like Git. Initial settings in this type of project can include more task statuses like To Do, In Progress, On Testing, Ready To Release, and Released to account for QA and DevOps work. Of course, you also can change these statuses and transitions, add your own and configure them.
For example, we at Mad Devs use this type even for non-software development since we use Agile methodology for all our projects, in which we have gained a lot of experience and developed effective practices. You can make sure of it by reading another rewarding article "Agile Project Management Using Jira."
What are the project elements for building the workflow in Jira?
The power of Jira is that the workflow can be highly customized for each project and adapted to the specifics of each team. Let's look at the main elements responsible for its construction and various options for configuring their interaction.
- Statuses. Task statuses show what state a task is in. There are default statuses such as To Do, In Progress, and Done, but you can create intermediate statuses that show the task's state in your project more precisely.
- Transitions. Transitions define how tasks move from one status to another. For example, you can configure transitions by specifying that a task cannot go from To Do to Done status bypassing In Progress. You can also define additional conditions, validators, and post functions for transition.
- Conditions. They define what requirements are necessary to move a task to another status. For example, you can specify that some team members can move a task only from To Do to In Progress and cannot move it to Done.
- Validators. They allow you to set the criteria necessary for moving a task to a different status. For example, you can specify that a task can be moved to the Done only if certain fields are filled in.
- Post functions. They allow you to automate the actions after moving a task from one status to another. For example, after moving a task to Done, you can automate changing the priority of another task, sending a notification to other team members, and so on.
Common mistakes in building Jira workflow
Unclear description of statuses
Creating custom statuses without a single source of truth and proper explanation to the team can lead to a disparate understanding of the statuses and an incorrect understanding of what state the task state is actually in.
By the way, we have an excellent article on what SSoT is. Why it's so important and how to build it. We guarantee that reading will be rewarding!
Excessive intermediate statuses
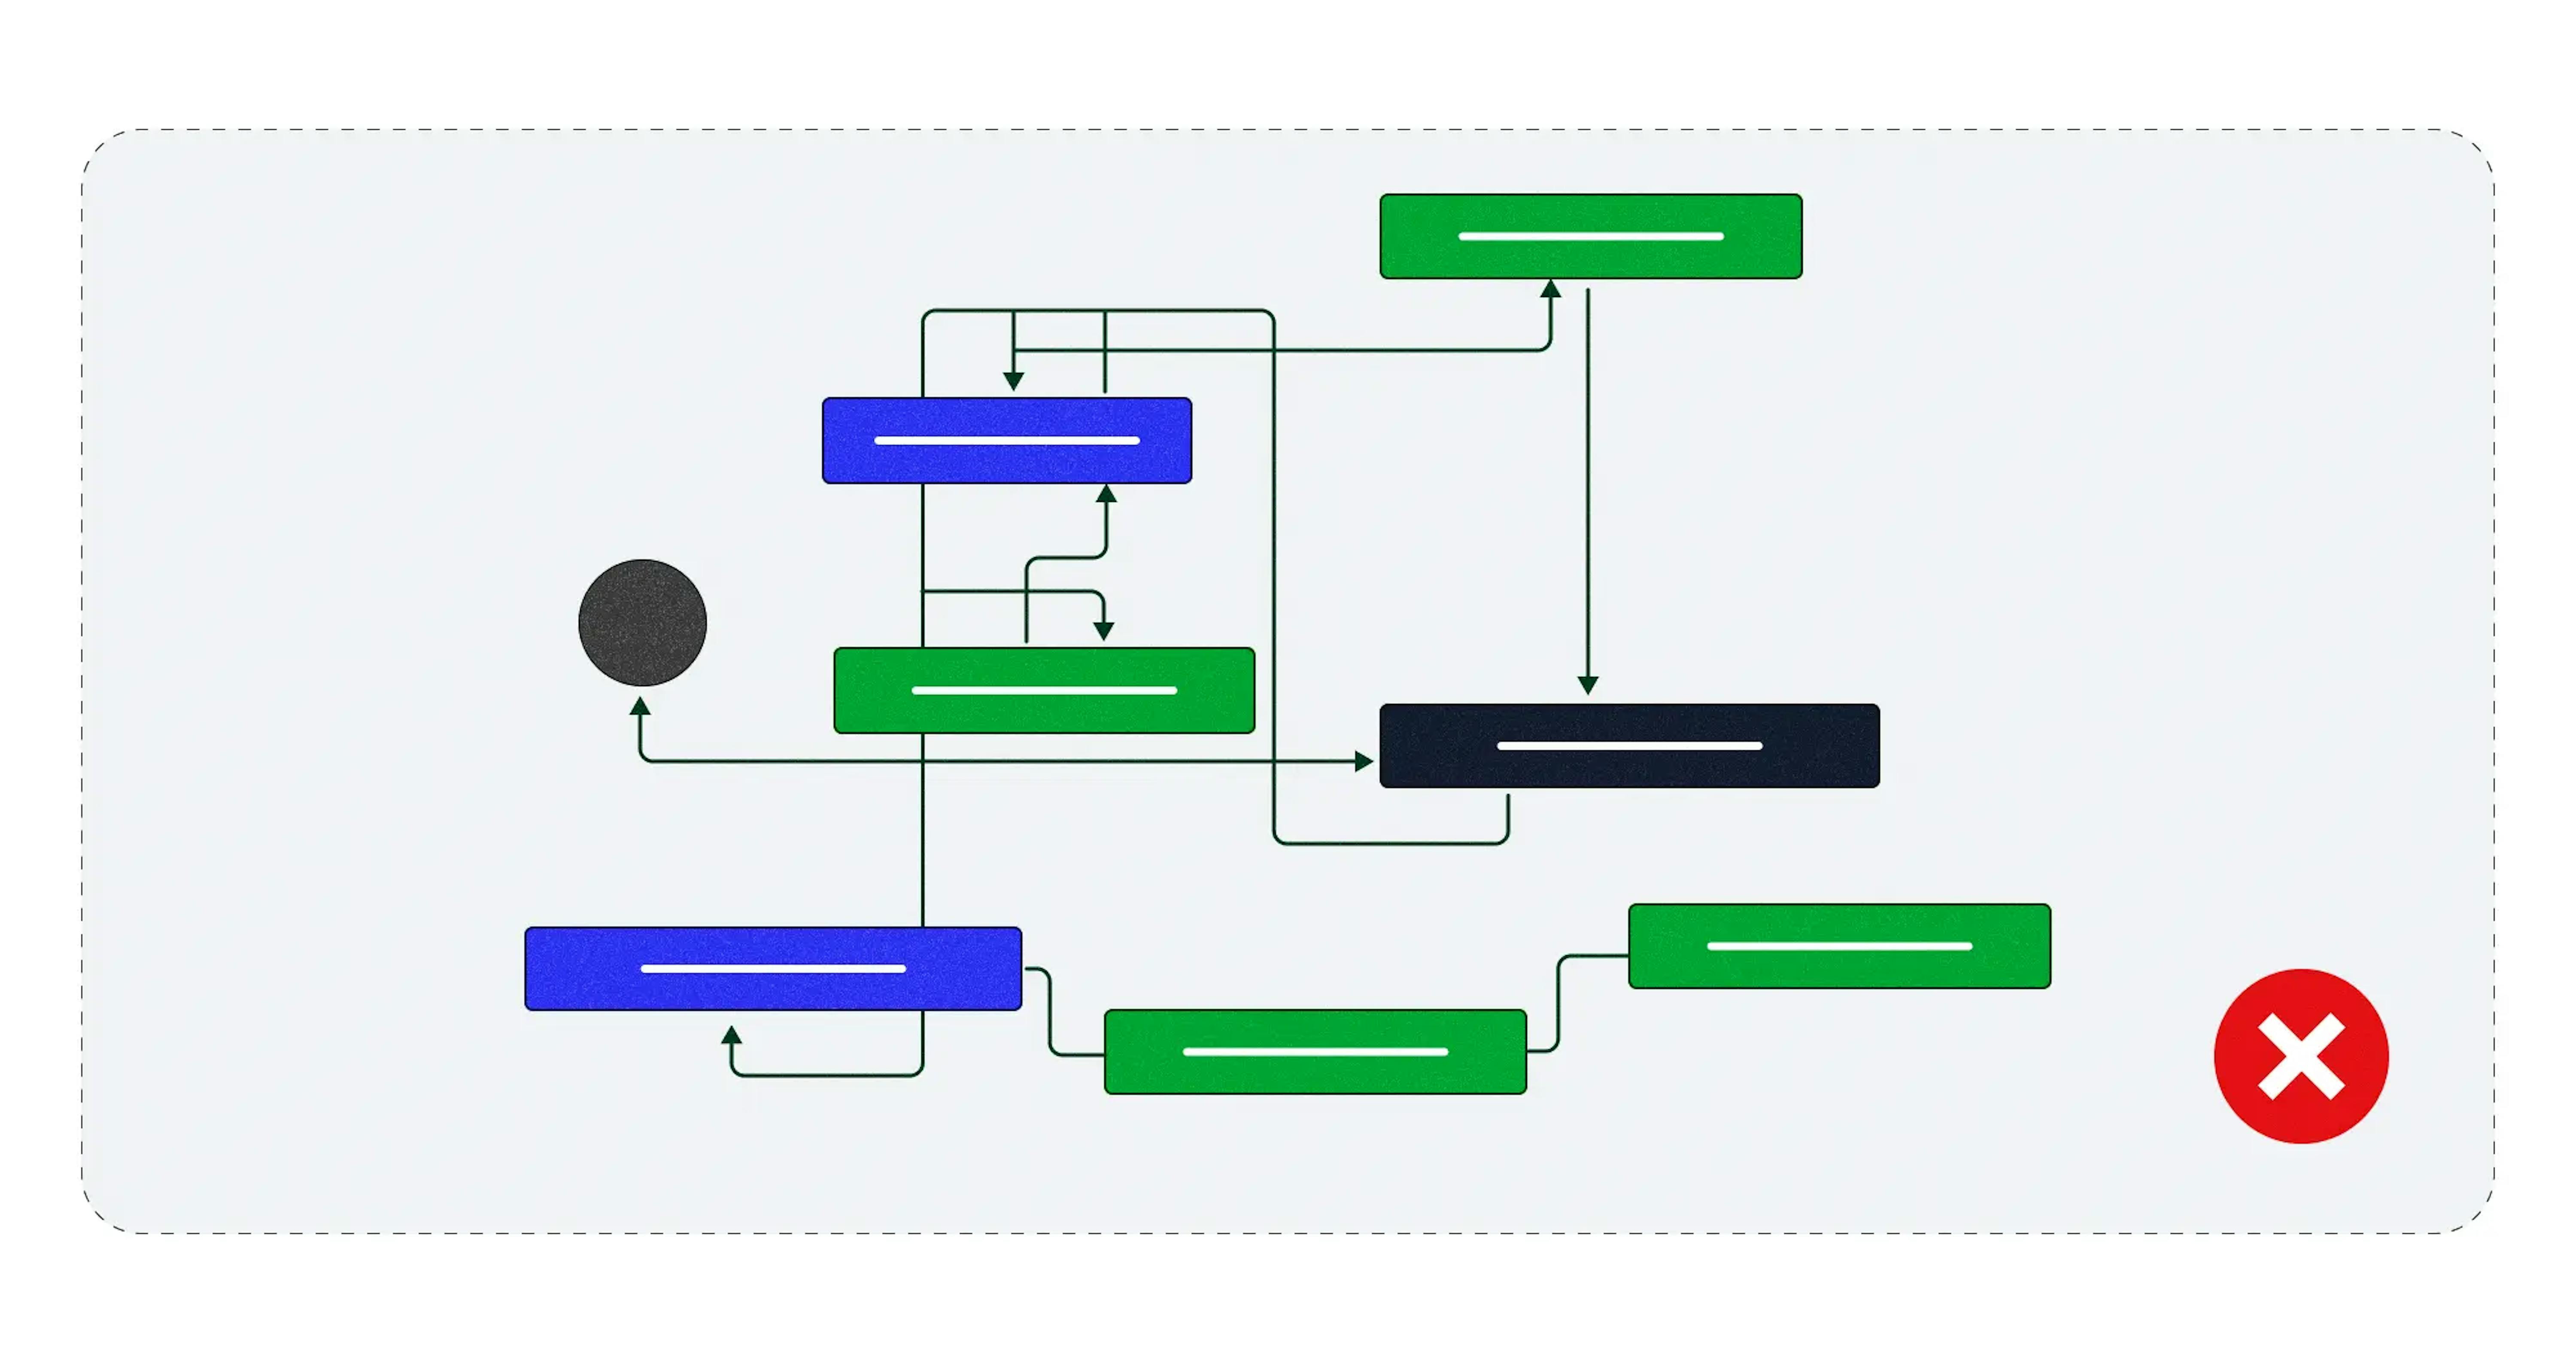
Creating an overly complex workflow with lots of statuses and transitions can complicate the workflow by requiring redundant attention and approvals between team members, making development much harder and slower.
Poor setting of conditions
Setting conditions and criteria that only consider some of the real options for moving tasks in the project, like moving tasks to previous statuses or through several following statuses, can lead to numerous blockers and conflicts within the workflow.
Best practices to streamline Jira workflow
Add the necessary statuses
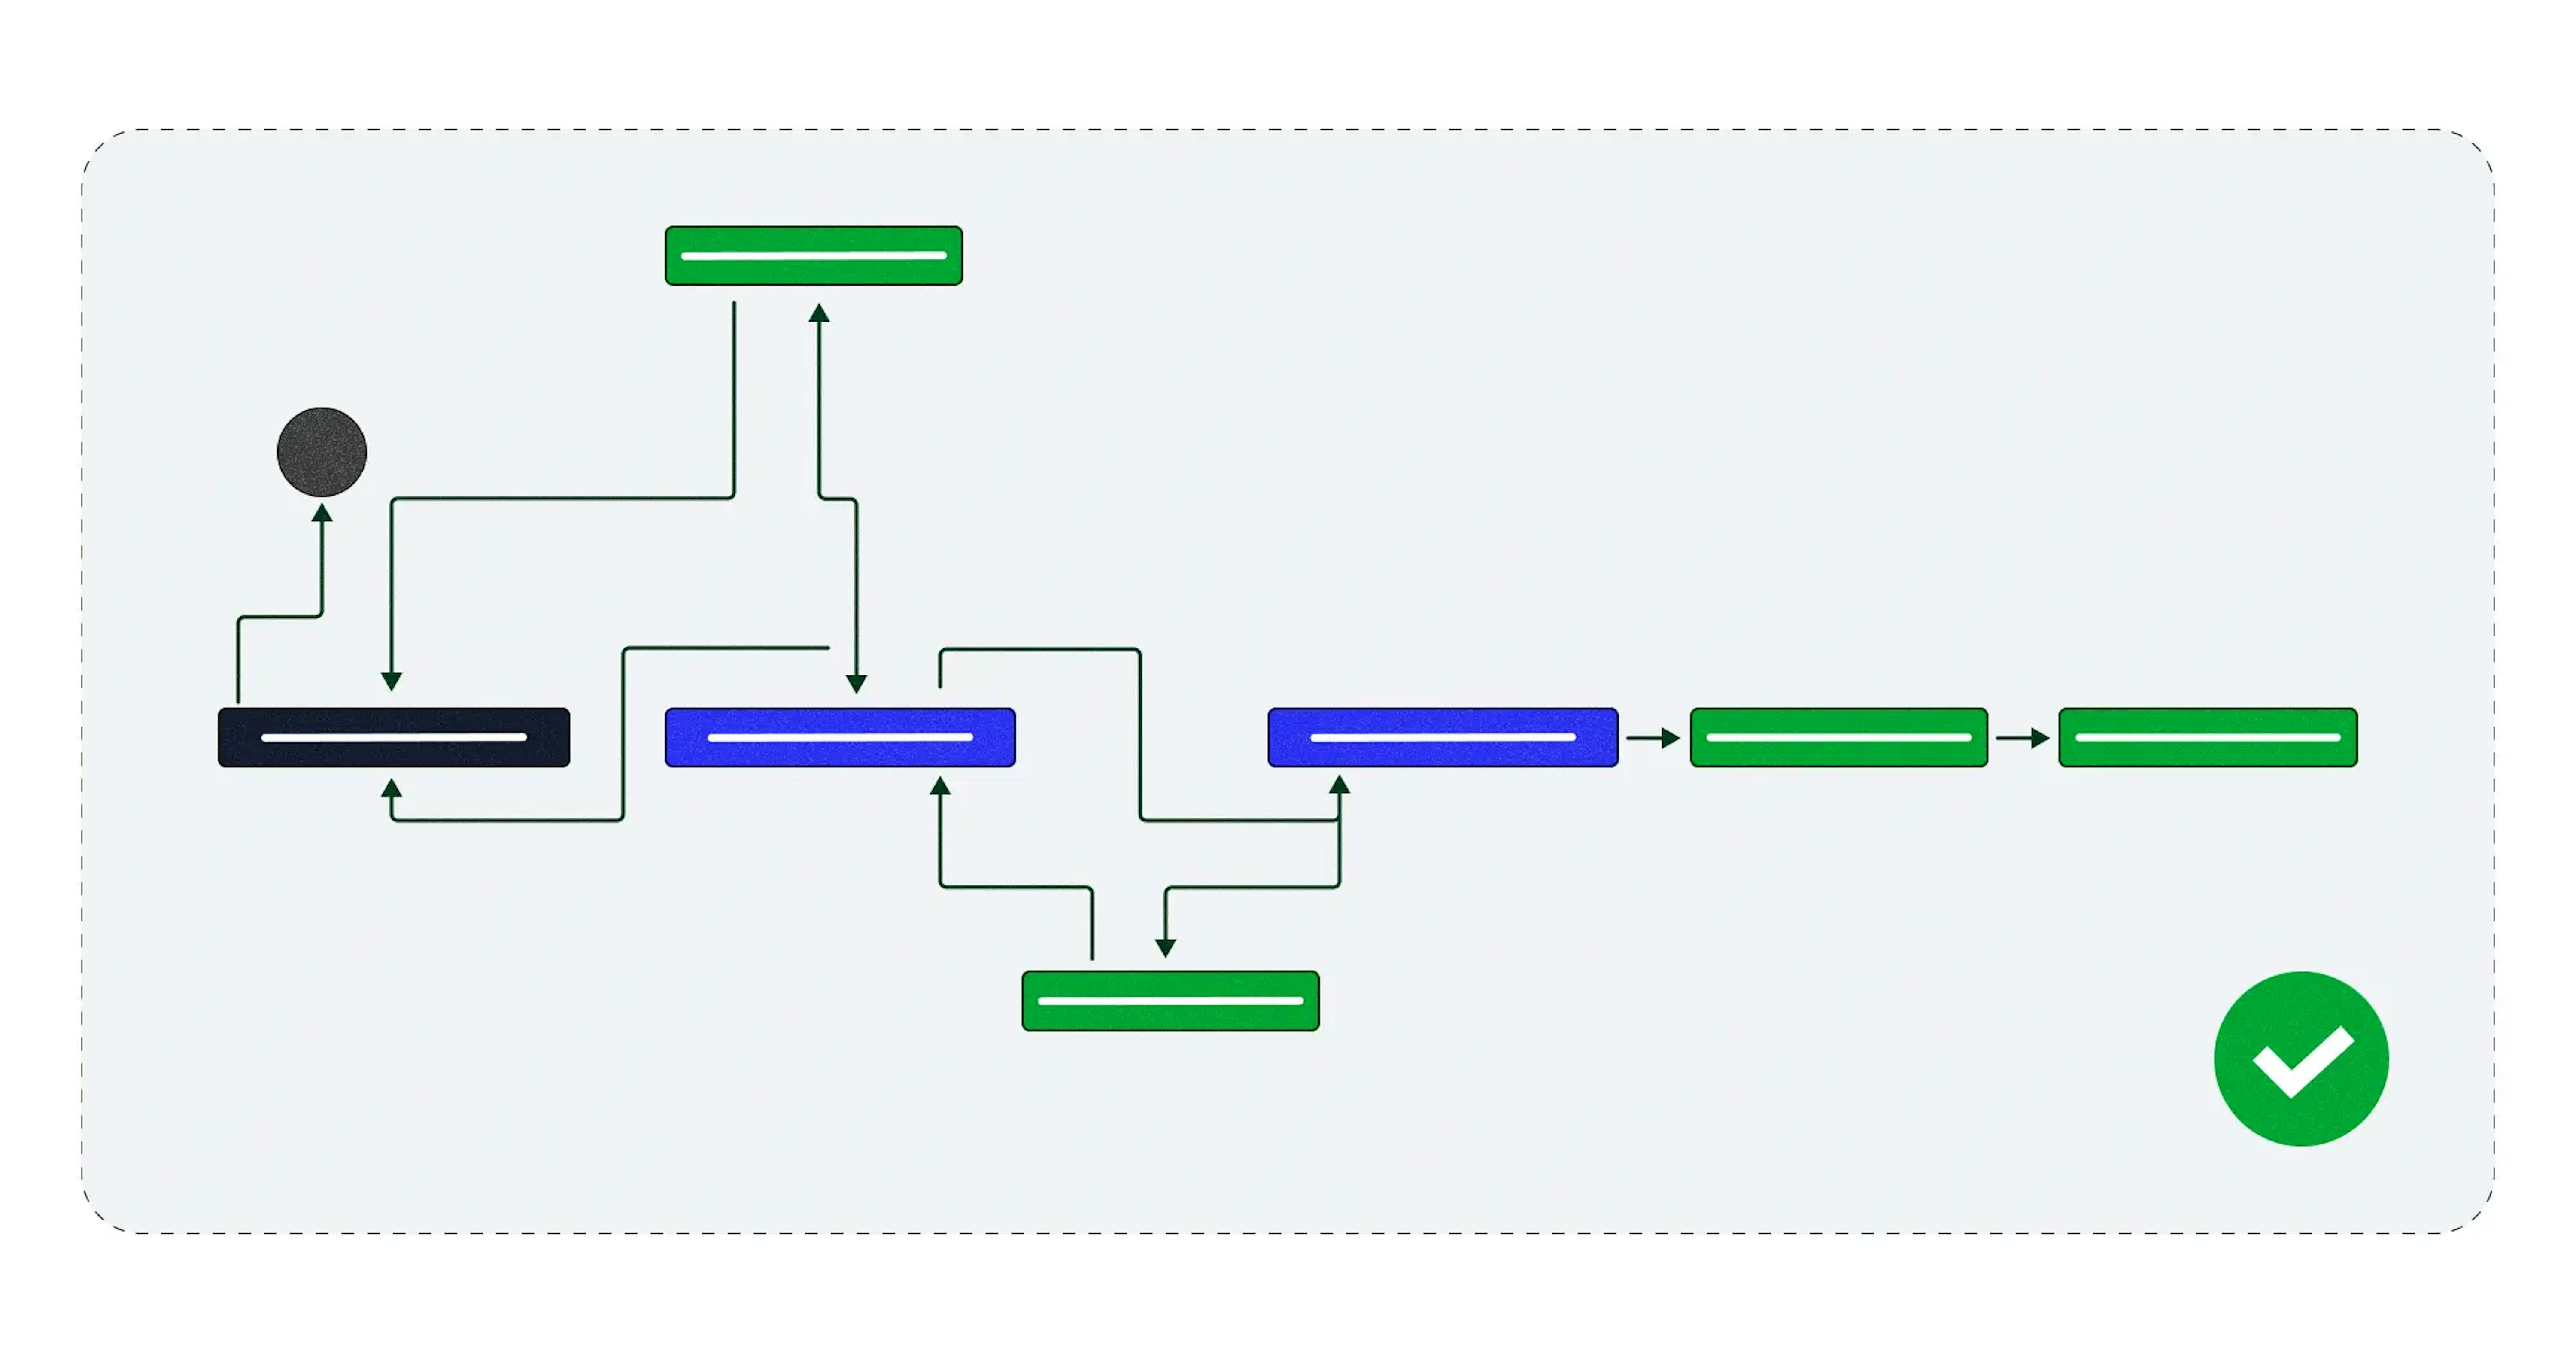
To simplify the workflow, you can also overdo it by not making it precise enough. Adding more statuses that more accurately represent the state of each task can make development much more transparent, which can be critical for a project.
For example, your stakeholders want to have a comprehensive view of the state of each task so they can make more precise decisions about the project, take new initiatives, and make changes. Due to increasing competition, this need is critical not only for success but even for the company's survival and should never be ignored.
Or a particular project can be extremely large and complex, and it involves many people from different parts of the world living and working in different time zones. In that case, they will need a much more accurate representation of tasks so they don't run into blockers when the employee they need is unavailable.
Keep track of team and project needs
Consistency gets results, but it shouldn't be redundant. Not only does the workflow need to be built correctly from the start, but it also requires constant improvement.
Get regular feedback on how well the workflow you have built provides transparency and efficiency for all project members, from stakeholders to each team member. Document this feedback and create tasks based on them so that supporting transparency and efficiency is a measurable and achievable goal in addition to the original project goals.
Use task re-linking
Your project may have several large teams working in parallel and requires you to create separate boards for each to avoid having too many different tasks in one place and creating complexity in managing them.
For example, you create one board for Back End and another for Front End to make it more convenient for you to work with them separately, but you still need to connect some tasks from different boards. In this case, you can use task linking, and as soon as the Back End components are developed, tested, and deployed, the Front End team can move their related tasks to the appropriate status and deploy their components back to the previous ones.
Use automation
You can use automation for many tasks with many default tools like conditions, validators, post functions, and integrations. Explore the whole wide range and all of their capabilities. Learn how exactly they can help automate your project.
Quality automation will save a huge amount of effort and time, avoiding some mistakes that people can make due to fatigue or inattention.
How to adapt Jira workflows for any department?
In addition to avoiding common mistakes and following universal practices, the key to quality adaptation and building company- or department-specific workflow is the study of processes. You need to properly collect and process all the necessary information to build the workflow according to specific company, department, team, and project processes.
At Mad Devs, for example, we've always focused on processes. Over the years, we've developed proven practices for building them effectively at every stage of development, which we've shared in detail in our book "Approach to the Software Development Process." It's free to download and incredibly useful for companies' applications.
So, adapting a workflow for any department or project can be divided into the following main sequential steps:
Study the processes of the department. First and foremost, you need to study a particular department's work processes and needs thoroughly. Talk to team members to understand how they do their jobs, what tasks they have to do, and how they interact with each other.
Identify key statuses and transitions. Based on the processes you studied form the basis of this workflow. Ensure they represent the tasks' actual stages and provide for all possible scenarios.
Create a workflow. In Jira, create a new workflow, add specific statuses, and set up transitions between them. Consider the specifics of the department, including permissions, conditions, and validators to control access and correctness of operations.
Customize fields and screens. Customize the fields and screens that will be shown at different workflow stages to meet the department's needs. Consider which fields are mandatory and which may be optional or hidden depending on task status.
Integrate with other tools. If the department uses other tools or systems, consider integrating with Jira to facilitate collaboration and automate processes.
Training and support. Document workflow to make a single source of an exhaustive description of this available for every team member. Provide training for team members so they can effectively use the new workflow. Be available to provide support and answer questions that arise.
Monitoring and optimization. Review the effectiveness of the workflow regularly and obtain feedback from team members. Document it and make it the actual task. Implement corrective action and optimization as required to improve processes and departmental performance.
By following these steps qualitatively, avoiding the previously mentioned mistakes, and applying universal practices, you are highly likely to build quality workflow. And for more illustrative examples, we move on to the next phase, in which we will share specific Mad Devs examples of how we have successfully built and maintained different types of workflow depending on a client's or project's needs.
Although every project is different, such universal practices can help you build the right and streamline your workflow in Jira.
Mad Devs approaches to building Jira workflow
Now, let's look at some examples of building and improving the Jira workflow that we've done. Let's start with a few departments other than direct development.
A separate workflow for the product team
We had two teams, one of which was the product owner team, which writes the technical requirements for the tasks, prioritizes depending on their product research, and accepts their implementation. The other is our development team, which distributes them among the members and is responsible for their implementation, testing, and handing them over to the product owner.
The challenge was that the product owner team didn't have technical specialists who could observe the workflow on the development board and fully understand the technical meaning of the statuses and transitions on it. So we created a separate board for the product owner team and a separate board for our development team.
Our development team had a workflow on the board, consisting of To Do, where the tasks created by the product owner got and then moved by us through In Progress, Solved, and Ready to Test statuses as they were completed. Our Team Lead checked if the task was completed correctly. Then, it goes submitted to the Ready to Test status. And the product owner team opens the associated task.
On the product owner board, the workflow started with Ready To Test, where the team received the completed task and checked it against their own criteria by moving it to In Testing, Confirmed To Release statuses. Once the product owner team approves the task for release, it becomes visible to both teams. After the release, both teams move the task to the appropriate Released status.
This allowed each team to work in a familiar workflow while maintaining clear communication and ongoing development with stable releases.
Before development, we learn business processes individually and make them fully measurable and the most effective. Ensure that our development is completely transparent and all clients can see what they are paying for and get only real value for their business. If you also want a personalized approach, sign up for a free consultation with us. And you will get only the most profitable solution.
Separate workflow for the sales team
Working with another one of our clients on their product, we closely interacted with their sales team, which has a totally different workflow than the development team. They used a popular Miller Heiman Strategic Selling, which helps to work out sales details, moving them through many stages.
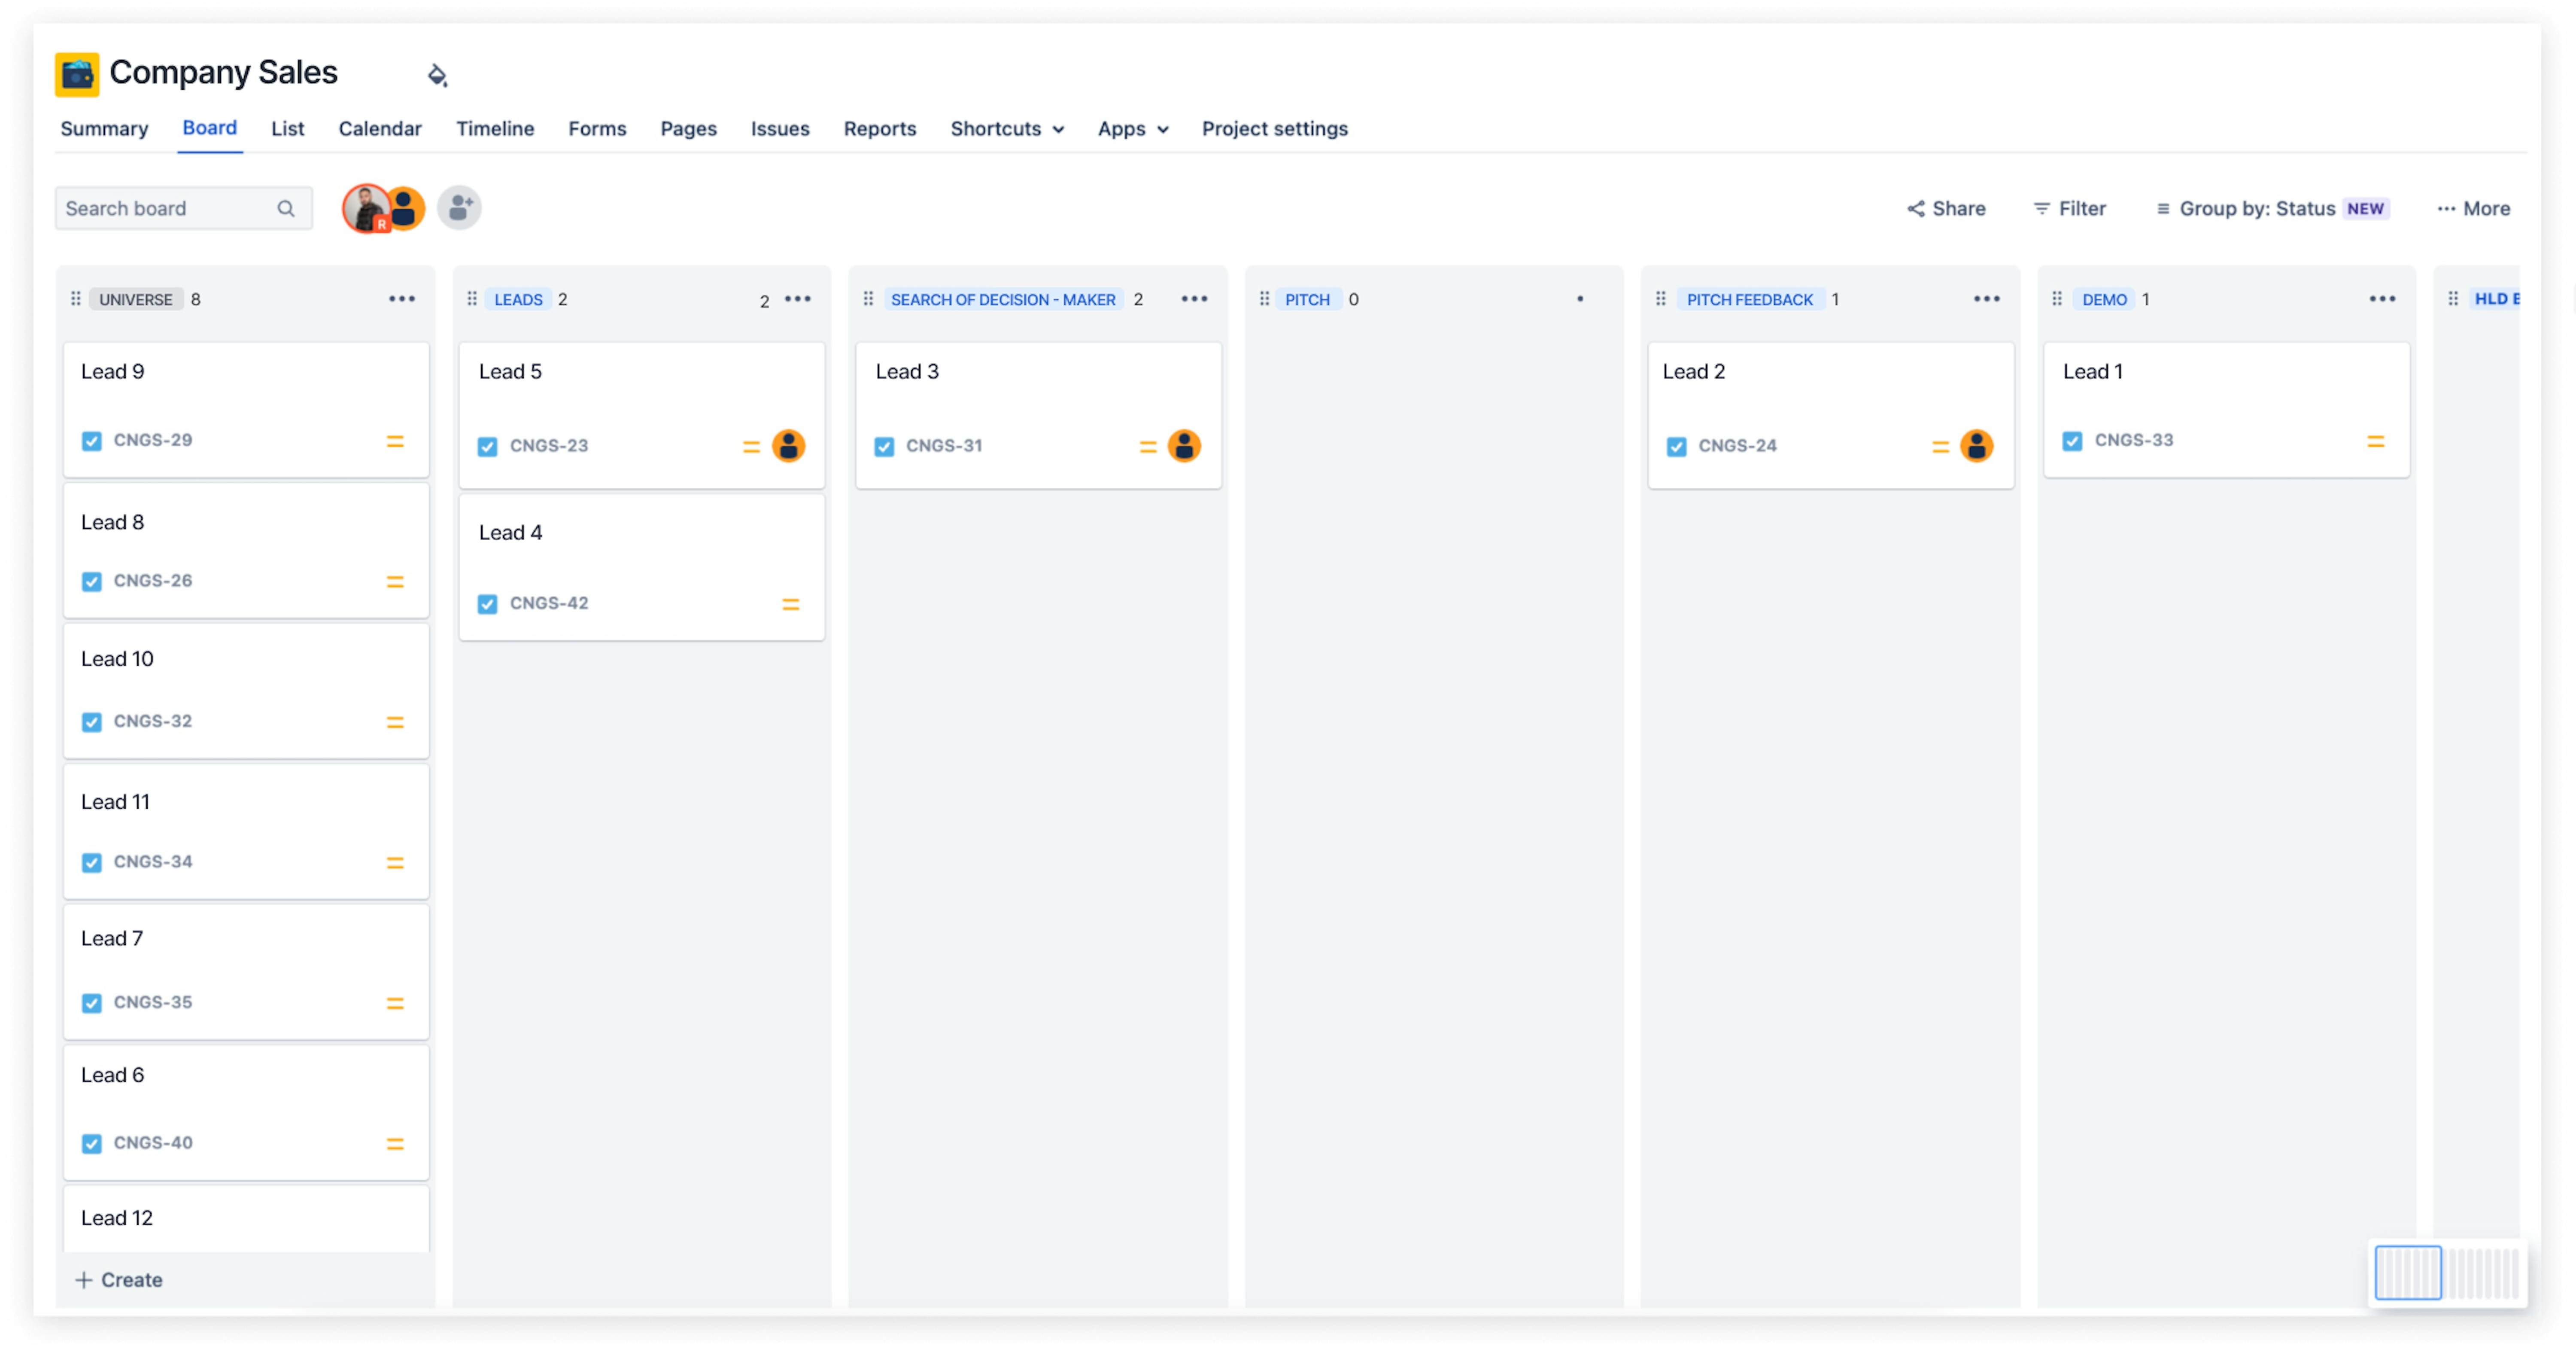
- Universe. Potential leads that the sales team is going to work with.
- Lead. The sales team is ready to negotiate with the company.
- Decision makers searching. Searching and first contact with company representatives, the agreements to negotiate.
- Pitch. The first negotiations, presentation of services, and possible options for cooperation.
- Pitch Feedback. Documentation of the negotiations and a pause for the company's representatives to discuss with the directors.
- Demo. If a company representative comes back with a possible desire to cooperate, a product demo is prepared for them.
- High-level design brief. If the demo is approved, the next step is a detailed discussion of what the company wants to see in the product.
- High-level design. All the requests and requirements of the company are gathered and shown to the engineers.
- Timing. Engineers estimate the time necessary to work on the product and explain the deadline to the company's representative.
- Interaction formats. Discussion of formats, participants, and other aspects of interaction with the company.
- Offer. Formation of an offer with defined services and pricing.
- Offer approving. Study and approval of an offer by the customer.
- Low-level design. Preparing full and detailed technical requirements.
- Agreement. Discussion and approval of legal agreements.
- Contract signing. After which the project goes to the development team.
Such a workflow may have slight differences depending on the company, but its main stages with the configuration of all the dependencies and criteria we moved to Jira, creating a board for the sales team. That way, they didn't have to use separate tools and do their work in isolation from the other teams.
GoDee workflow
One of our projects in transportation and shipping in the rapidly growing Asian market is GoDee, for which we decided to build a workflow based on Kanban.
You can read more about the GoDee project, what challenges we faced and how we solved them, what approaches and practices we used, and what technologies we applied in our GoDee case study. Also, enjoy many of our other cases where we detail each project development's stages and results.
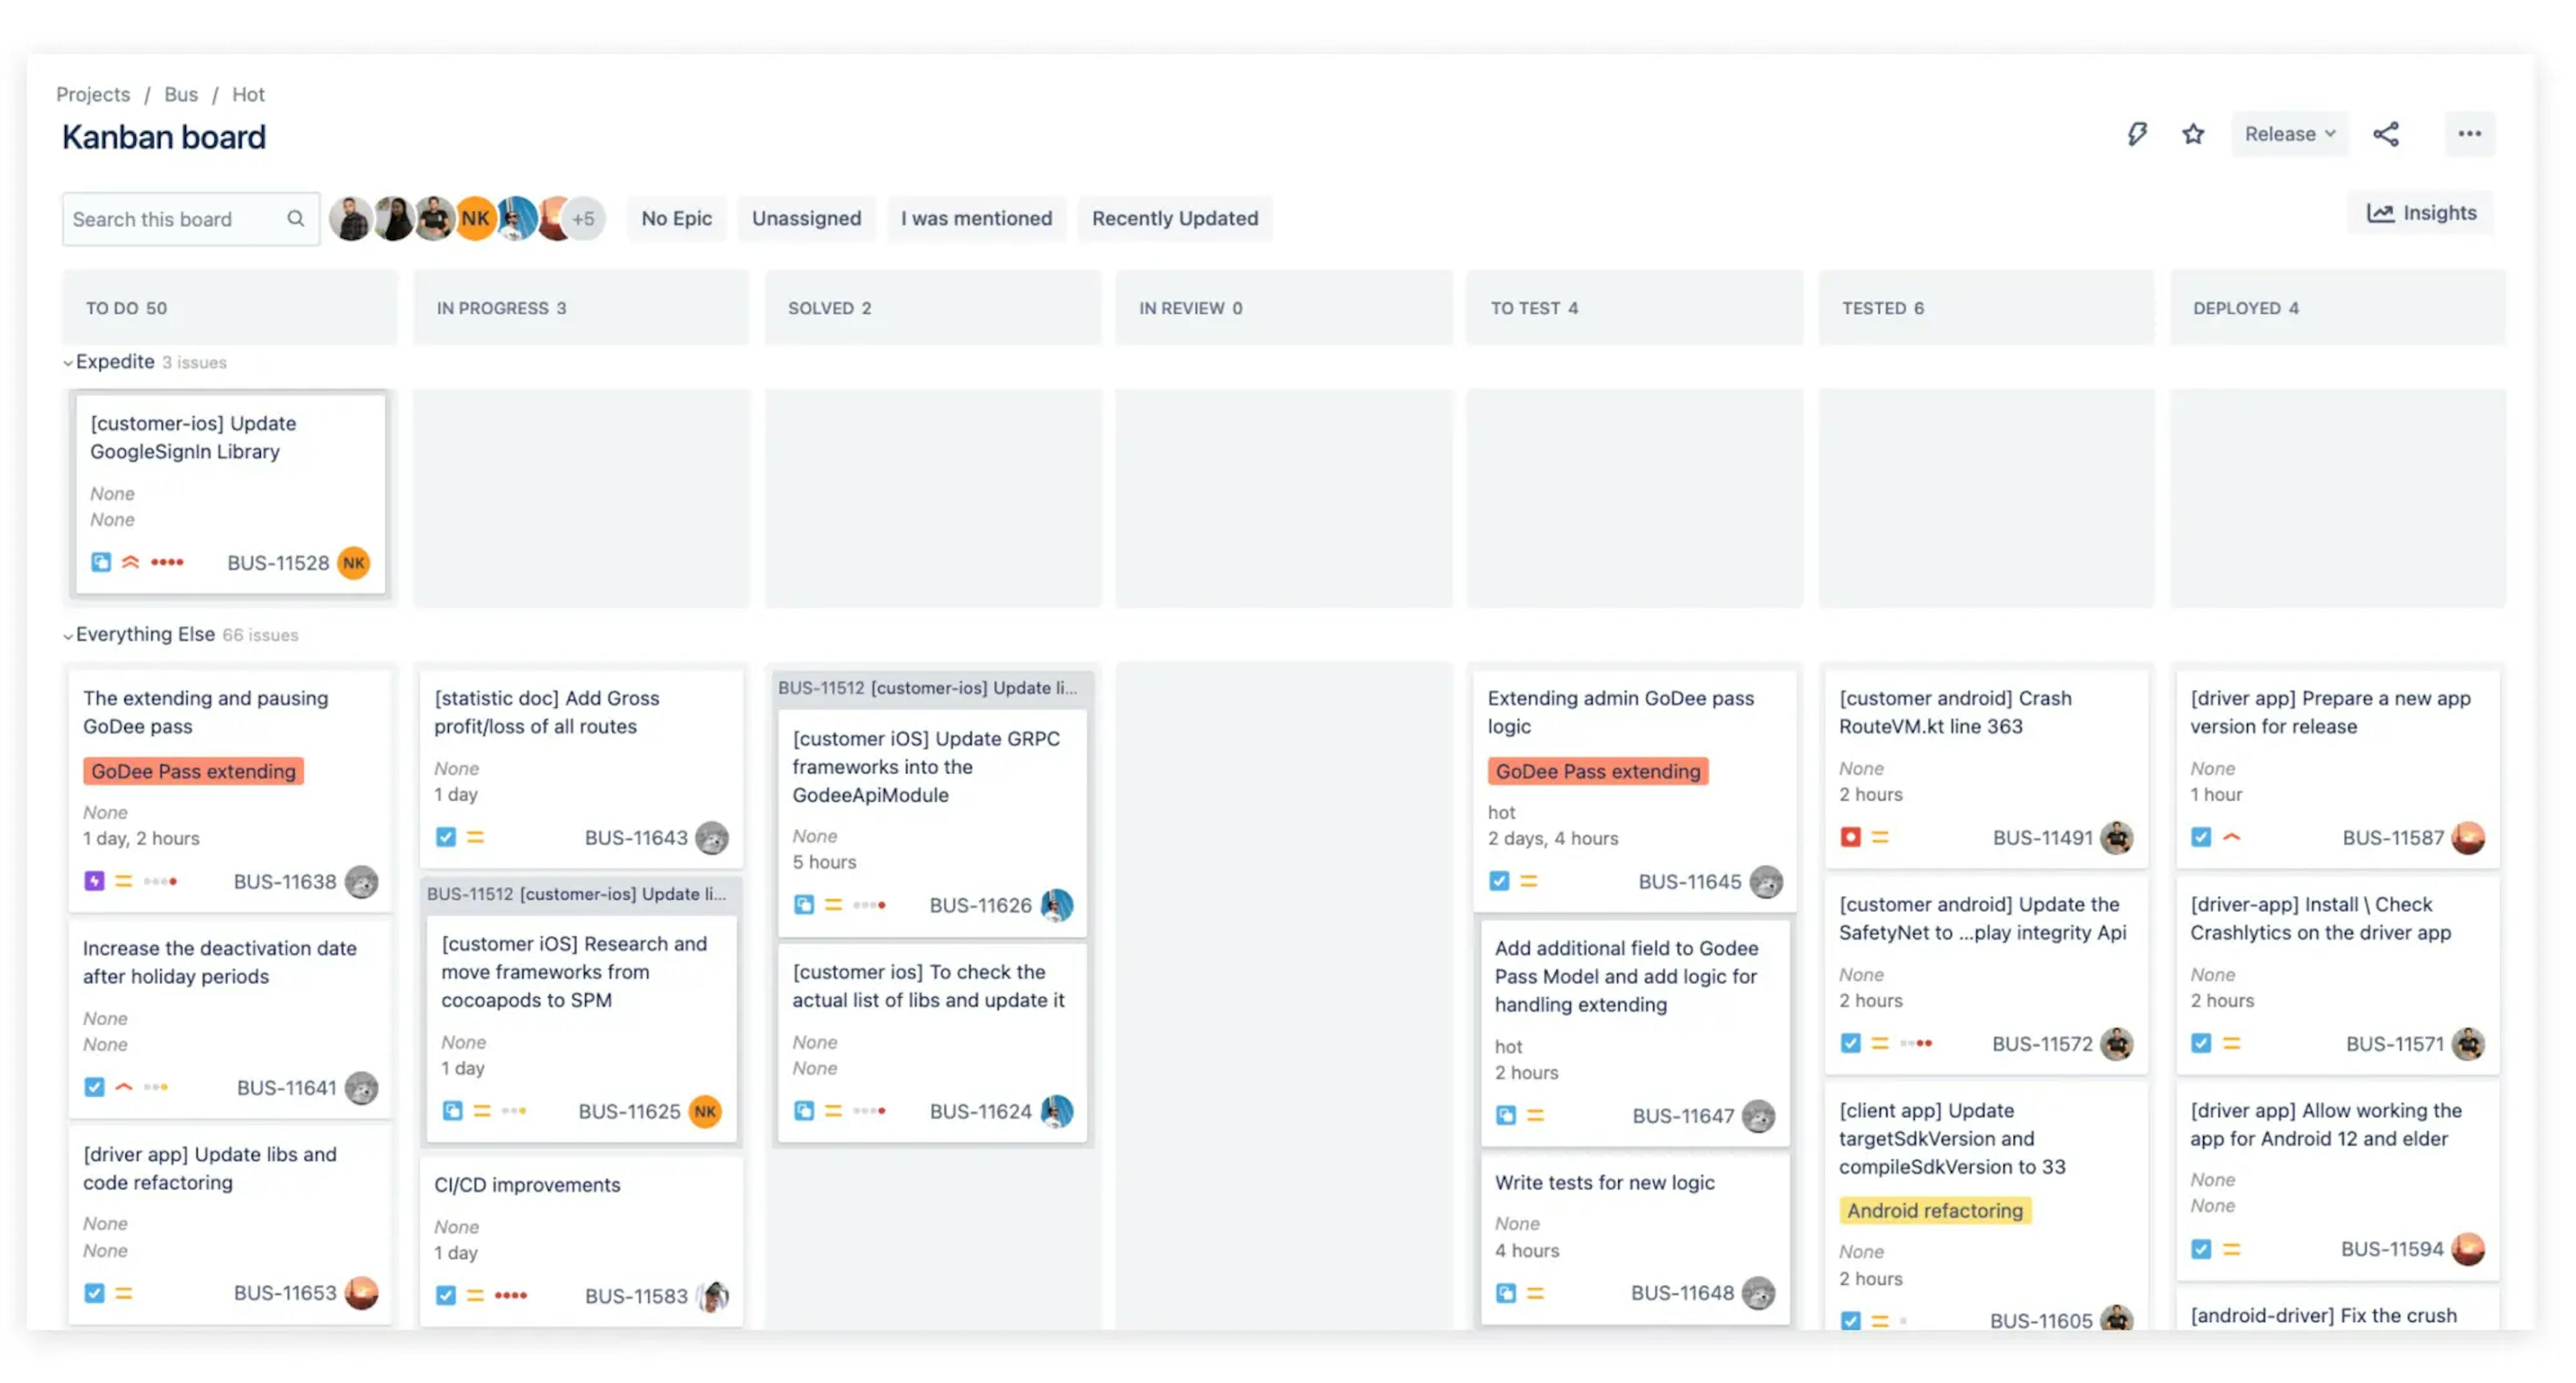
Our workflow in GoDee's case was a Kanban Board without Sprint Planning and Sprint Review and consisted of standard statuses like To Do, In Progress, Solved, In Review, To Test, Tested, and Deployed.
However, since there are so many tasks within the project with many different priorities, it would not be convenient to display them all on the main board. So we made an additional level within the board that serves as a backlog and stores tasks not displayed on the board until the project manager assigns them a hot label.
As soon as the task receives this label, it is displayed on the "hot" board, where the project manager places it at the height in status that corresponds to the execution priority. The developer then assigns the task with the highest priority and moves it up the statuses accordingly.
We also introduced an additional level of prioritization called Expedite, which appears in a separate field above all, even the highest priority tasks, in case there is an urgent need to do some hotfix or something urgent.
This additional level allowed us to use Kanban to create tasks as soon as they arrived but not to display all of them on the board, creating a mess. Each developer can clearly see the tasks to be done with low, high, and urgent priority.
Summary
As we said earlier, every company and project is a unique story, and workflow building is always slightly different. However, we have amazing tools like Jira, allowing you to customize and automate any workflow.
And to use all its power, you need to pay a lot of attention to the processes you will move into these tools. Follow universal rules and apply best practices. And, of course, don't stop there; constantly test and improve your approaches.
That's how we at Mad Devs got our expertise, and we are happy to share it with everyone. And if you want us to take a personal look at your business and help you optimize and automate it, you can always get a free consultation. We will offer you only the most proven and profitable solutions.

